Overview: Multiple Languages & Localization
Translate and link content in more than 50 different languages
Table of Contents
This article explains how Helpjuice supports multilingual knowledge bases and content localization. You’ll learn:
- How to add and manage multiple languages
- How to create and link translations
- How to use automatic and manual translations
- How to provide a seamless experience for users across languages
Video Walkthrough
Supported Languages and Translation Options
Helpjuice supports over 50 languages. You can add multiple languages to your knowledge base and provide content in the language your users prefer.
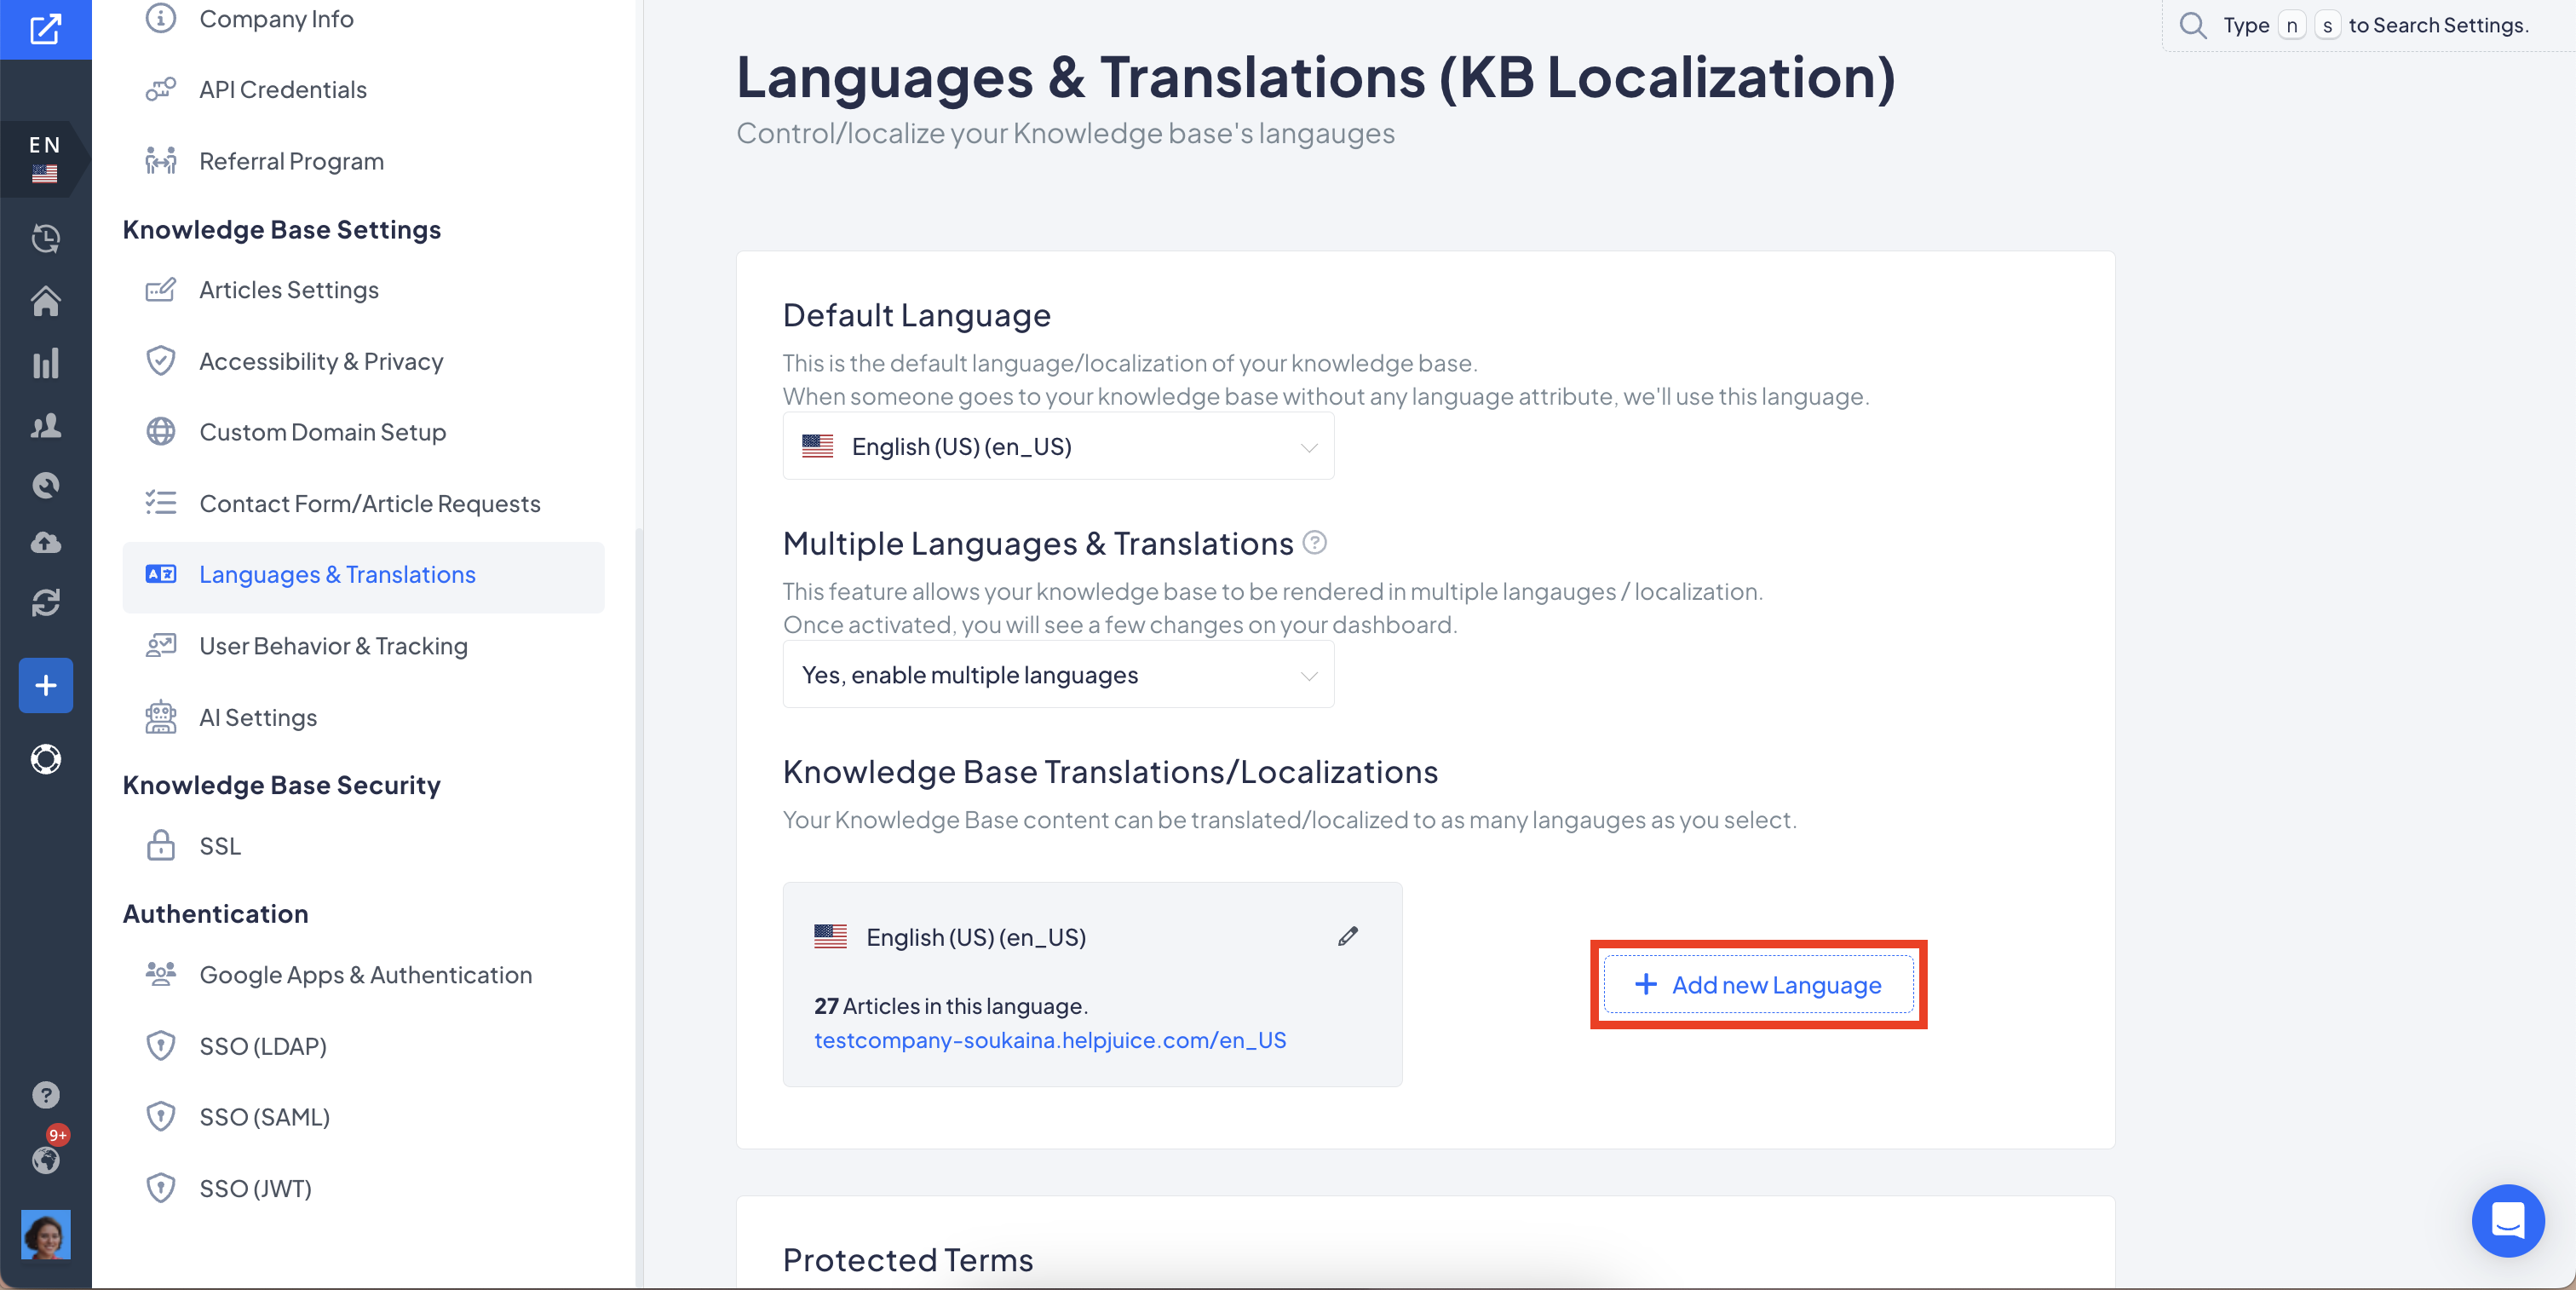
How to Add a New Language
- Go to your Dashboard > Settings > Languages & Translations.
- Click Add New Language.
- Select the language from the dropdown list.
- Click Save to add the language.
Translation Methods
Settings Page
Auto-Translate is an automatic machine translation using an AI engine. If you want to copy and translate everything from your main language into a new language section, check the this article.
Article Editor
- Open your article
- Click on

- Select the language, article destination, and the user you want to assign the translation to.
- Select a Language - Select the language to which you want to add a translation.
- Article Destination - Select the category in which you want to place the article.
- Assign Translation to - Choose which users will be assigned as translators. They will be notified via email.
- Automatically Translate this Article - Check this option if you want to automatically translate the article.
- Link an existing article - This allows you to link the translation to the content written in your default language. Check the section below for more details.
- Click on Add Translation one more time.
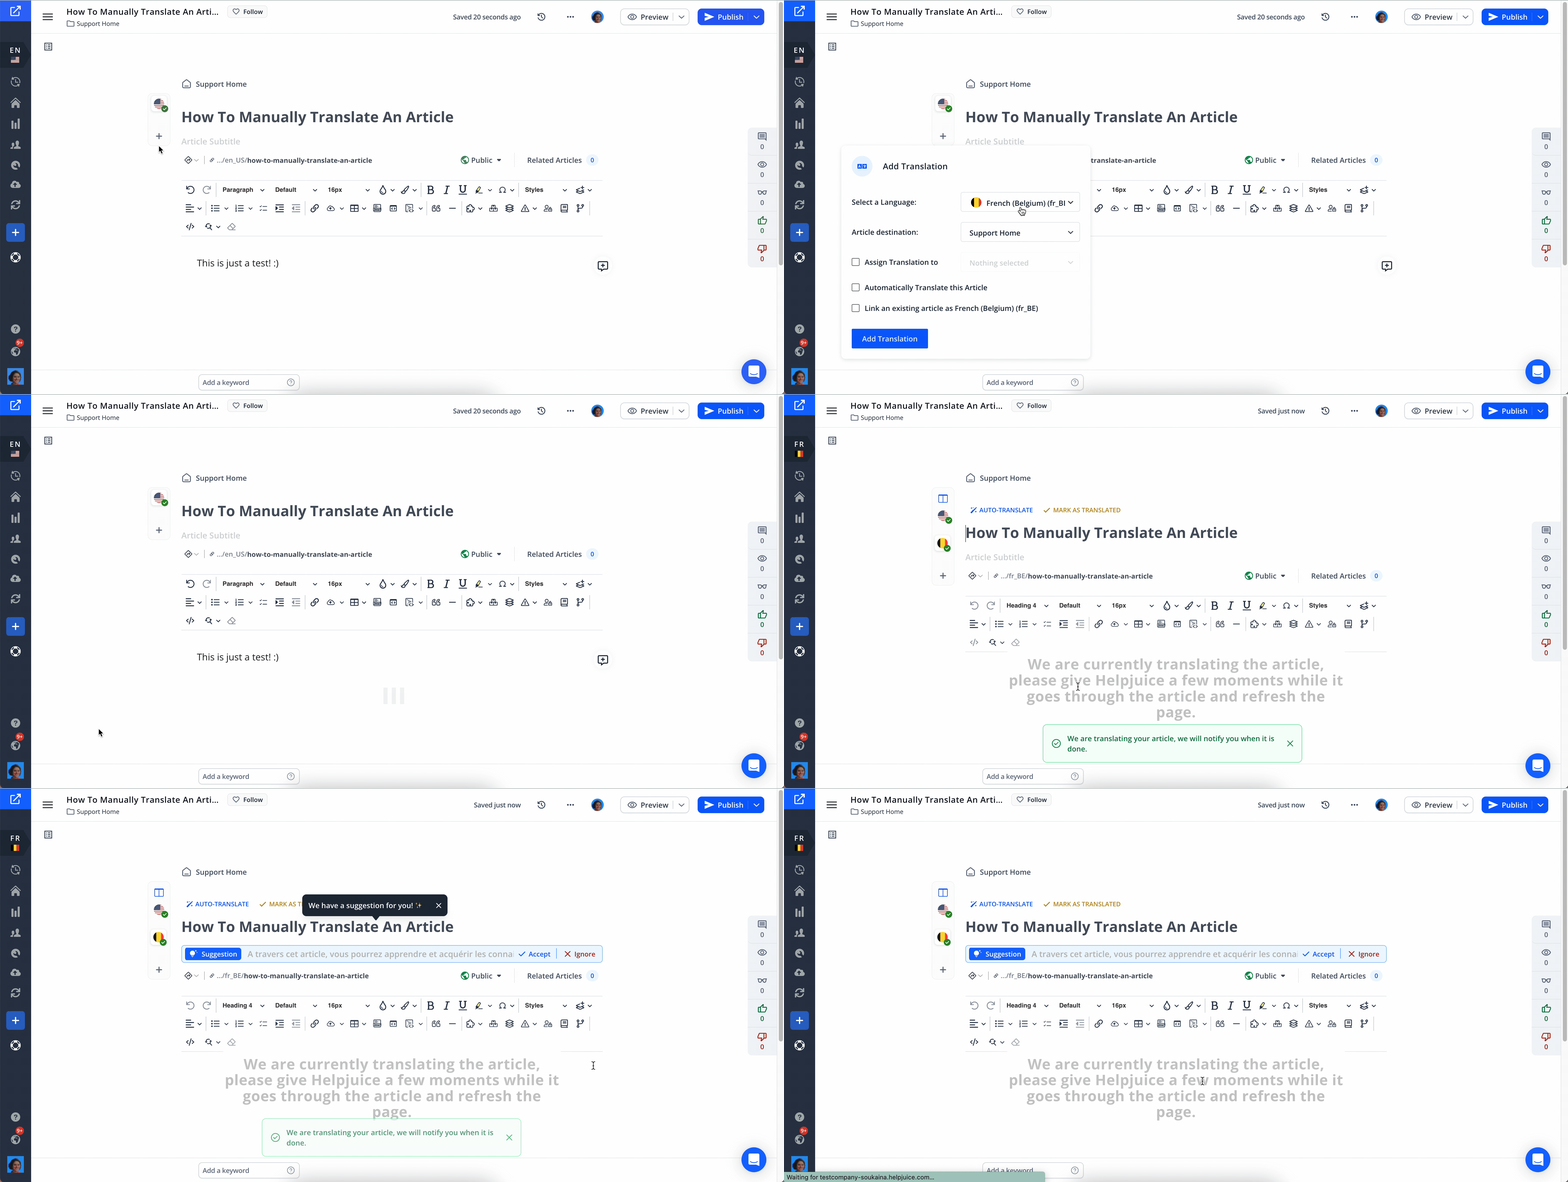
While in the editor, if you retranslate the content, any custom changes made to the translations will be overwritten, and the system will retranslate everything again based on the default language setting.
To revert changes or access previous versions, you can use the Revision History section on the editor or restore a backup.
Managing Article Translation Links
Linking Existing Articles
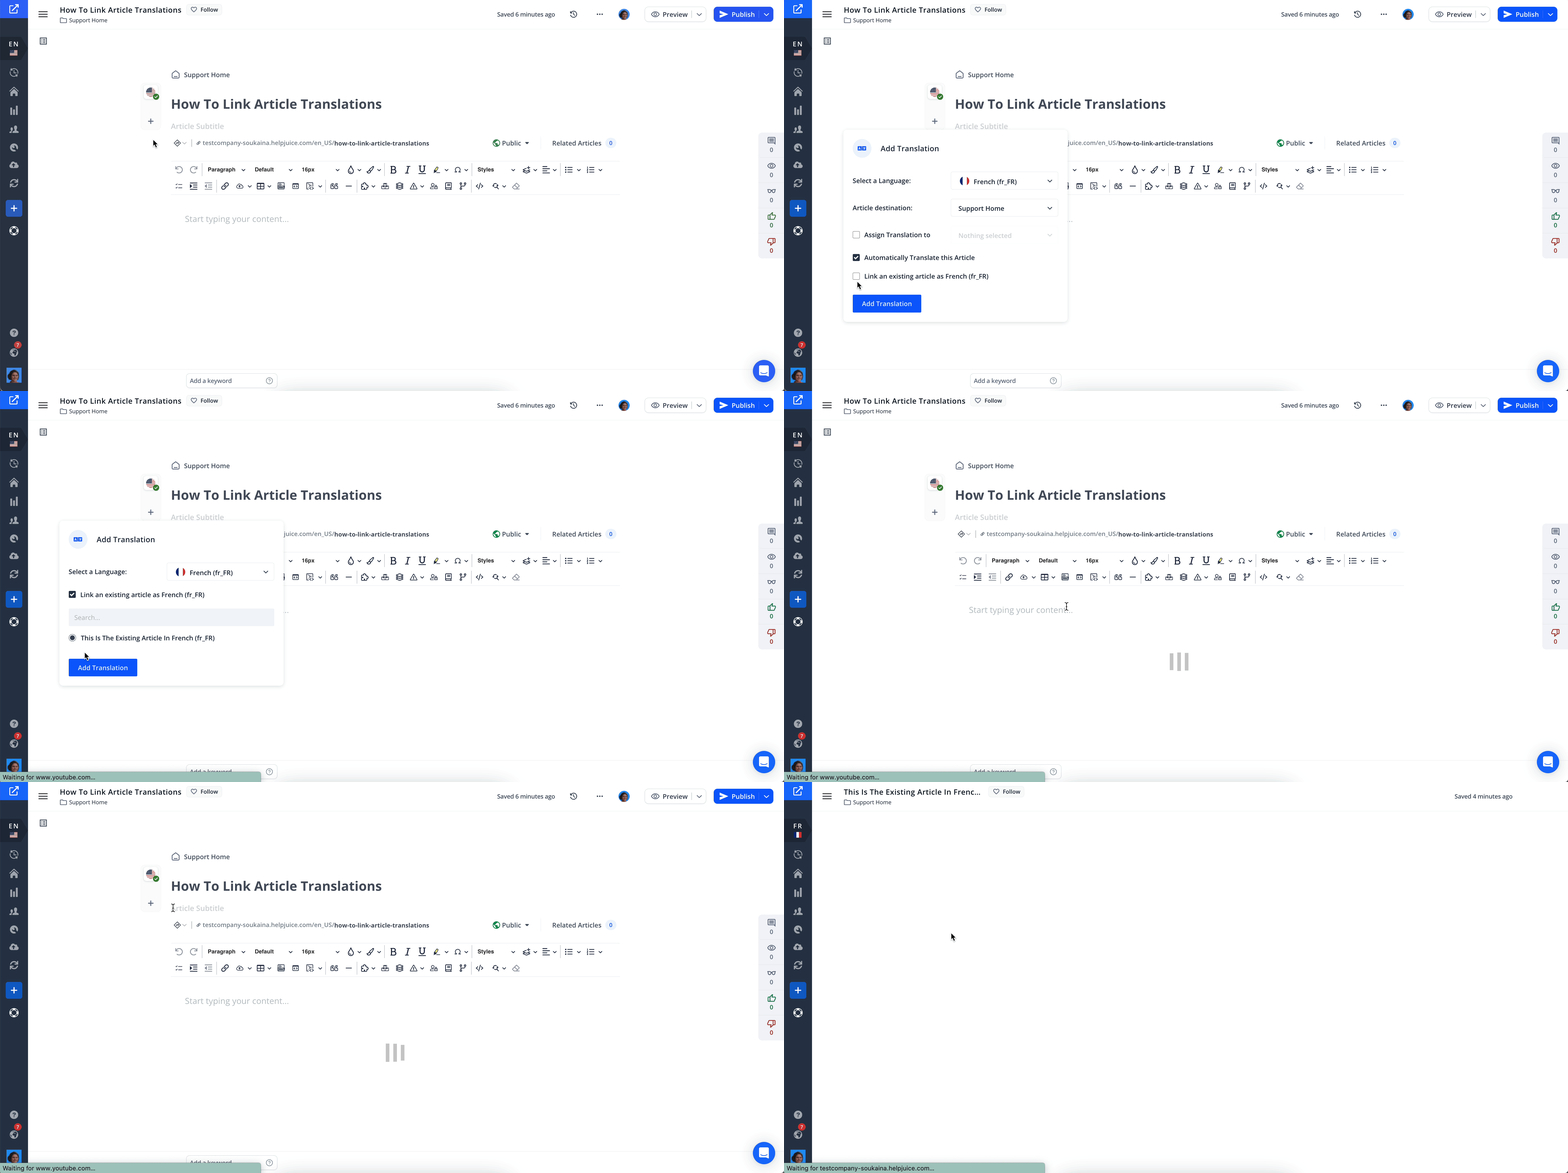
If a translation already exists, link it to the original article to maintain consistency and avoid duplicate content. When you link articles, users can simply use the language switcher displayed on the frontend to directly switch between article pages.
Let's say you have an article in English (and this is the original article, which means it was the first content created - not necessarily in your default language) and also in French.
If you want to link them together, access the original article view (which in this case is the English content) click on "Add Translation", select "French (fr_FR)" and click on "Link an existing article as French (fr_FR)". Once you select this option, a list of all French articles that are not linked will be displayed. Select the article and click "Add Translation". That's it!
Unlinking Article Translations
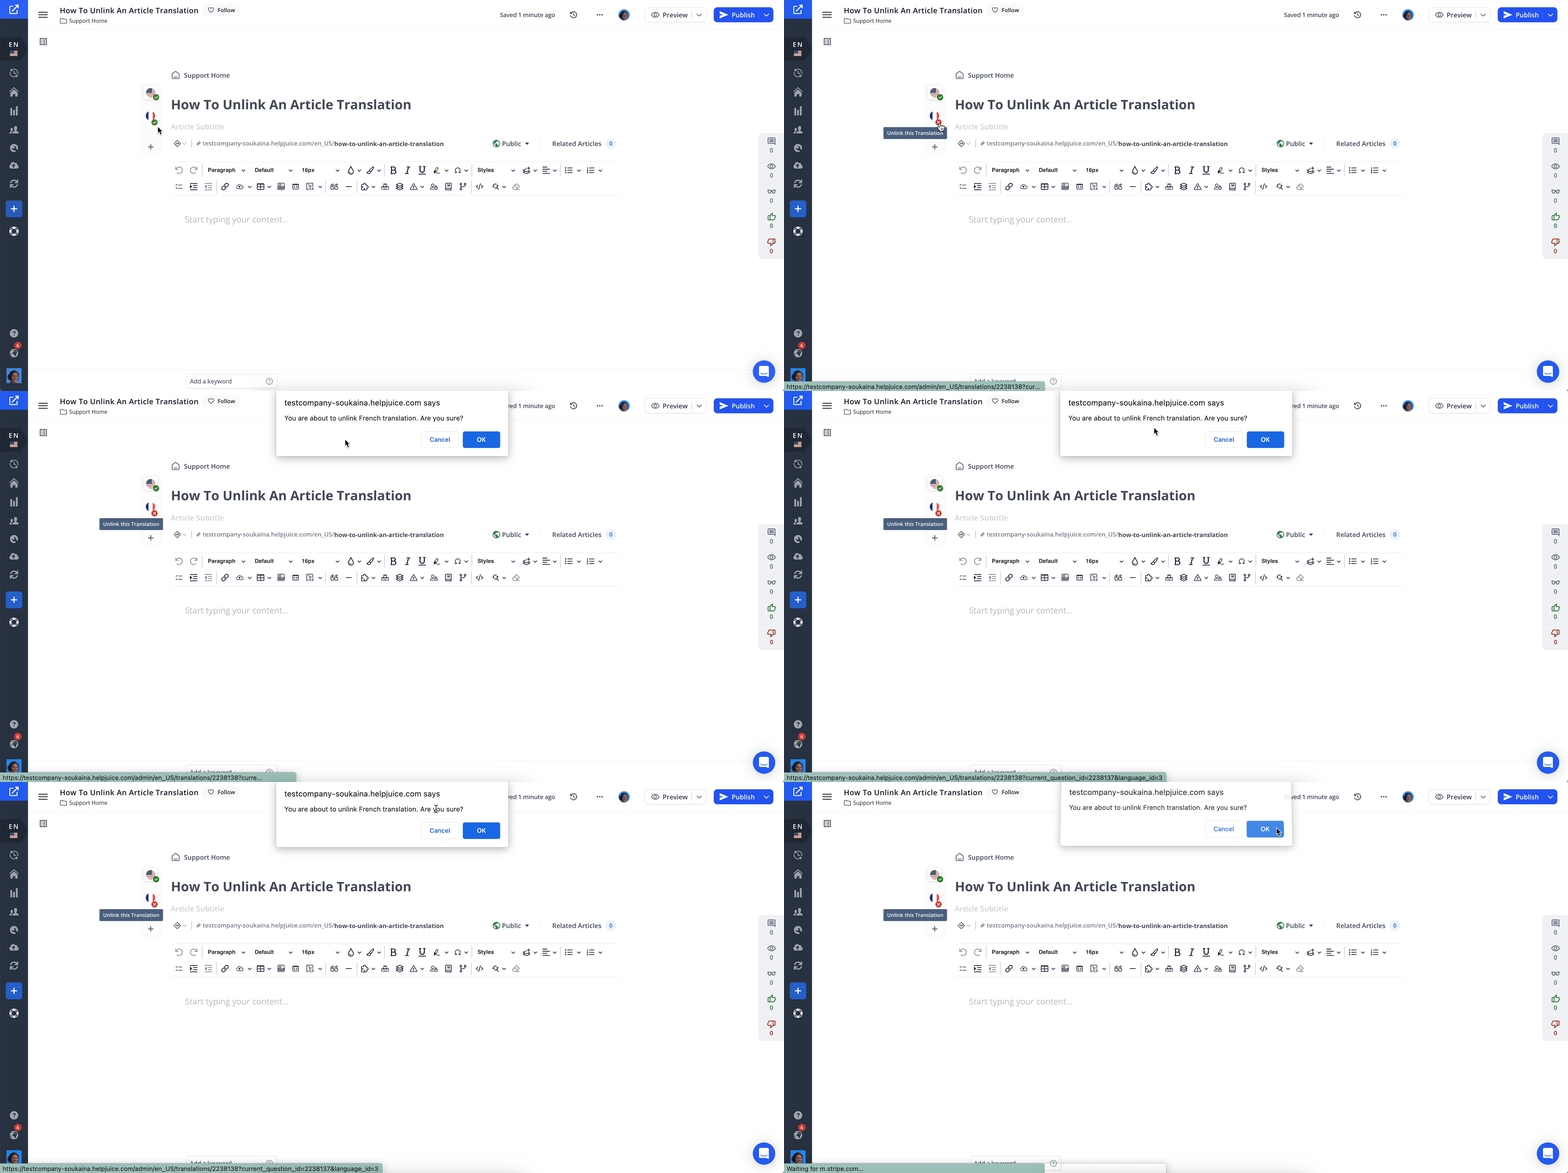
To unlink an article translation from its original article, you can follow the steps below depending on the editor you are using, and your article translation will be unlinked.
- Open the original article
- Hover over the
icon
- Click on Unlink this Translation
Translation Status and Views
Status
Article translations have two main statuses depending on their review stage:
- Verify Translation
- Appears when a translation is created without using Auto-Translate.
- Indicates that the content needs to be reviewed before publishing.
- Mark as Translated
- Once the translation is verified and ready, click “Mark as Translated”.
- This signals that the article is complete and ready to be published.
Side-by-side Translation View
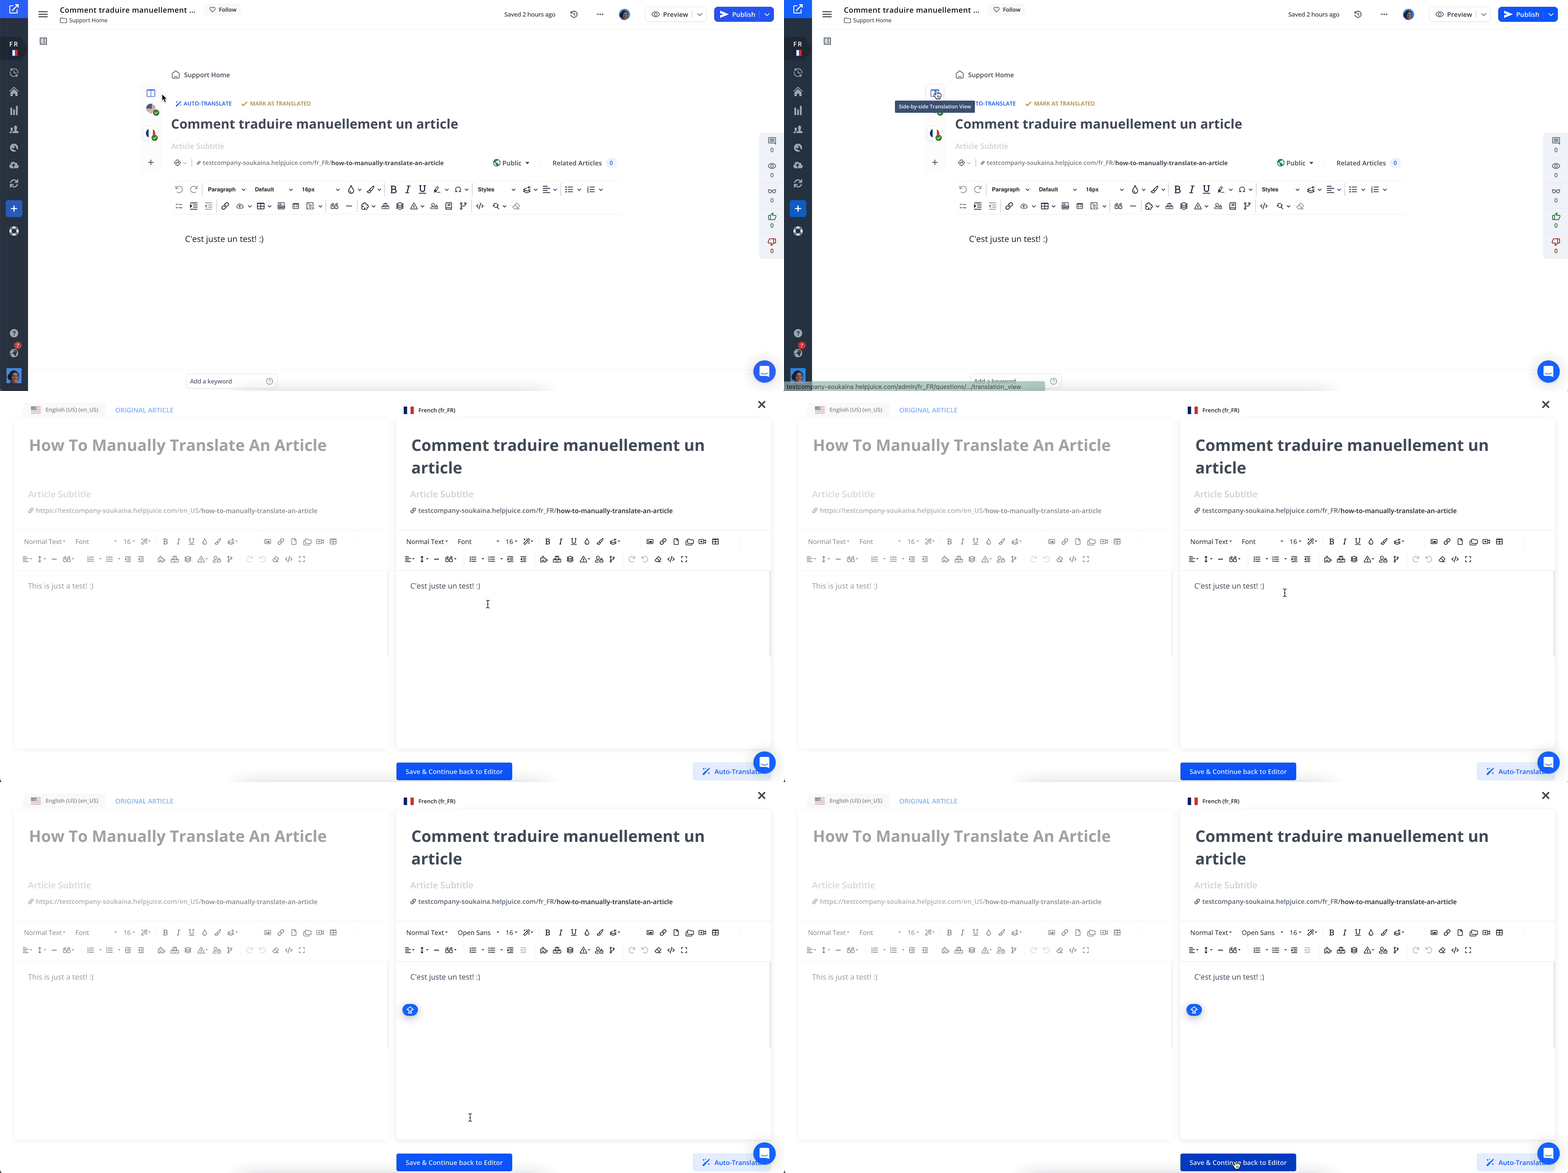
The side-by-side view allows you to compare the original article with its translation while editing:
- Click the blue side-by-side icon next to the translation tabs.
- Left side: Displays the original article (non-editable).
- Right side: Displays the translation you can edit.
- Translate the content manually or use Auto-Translate.
- After completing the translation, click Save & Continue to return to the editor.
Adding A Language Switcher To The Frontend
If you don’t see a language switcher on your Knowledge Base, it could be because:
- You’re not using the latest theme, or
- The language code hasn’t been implemented (for older themes).
To resolve this you can follow our guide on adding a language switcher or submit a Customization Request if the language picker still doesn’t appear.
Translating and Adapting the Frontend Design
Adding a new language does not automatically translate the frontend or carry over your existing design styles.
To update your Knowledge Base design for the new language:
- Submit a Customization Request.
- Include:
- A list of custom styles that need to be adapted.
- Terms and their translations for the frontend.
Our team will update your Knowledge Base so that both content and design match the new language.
You also have access to the Customize Area, so your team can update the Knowledge Base if you prefer.
Important: Helpjuice does not provide support for guiding users on adjusting their own code or troubleshooting custom code not implemented by our team. If you need assistance, please submit a Customization Request.
Additional Settings
To learn more about protected terms, and adding and deleting languages to your Knowledge Base, please check our Languages & Translations Settings article.
Best Practices
- Keep Translations Linked: Always link translated articles to the original to maintain consistency.
- Regularly Update Translations: Ensure that translations stay aligned with updates to the original content.
