US English (US)
FR French
DE German
SA Arabic
BS Bosnian

Contact Us

If you still have questions or prefer to get help directly from an agent, please submit a request.
We’ll get back to you as soon as possible.

Please fill out the contact form below and we will reply as soon as possible.

  • Book a Demo
  • Product Updates
  • Contact Us
English (US)
US English (US)
FR French
DE German
SA Arabic
BS Bosnian
  • Home
  • Customization Guides

How To Add Click To Zoom To Your Knowledge Base Images

Written by Denis Omerovic

Updated at October 15th, 2021

Contact Us

If you still have questions or prefer to get help directly from an agent, please submit a request.
We’ll get back to you as soon as possible.

Please fill out the contact form below and we will reply as soon as possible.

  • Getting Started
    Users Accessibility New to Helpjuice? Start Here Content Management Multiple Languages/Translations & Localization Multilingual Knowledge Bases Analytics Video Tutorials
  • Customization
    Customization Guides
  • API V2
  • API V3
  • Article Editor
  • Swifty (In-App Widget)
  • Billing / Subscription
  • Authentication
+ More

To enable click to zoom option follow these steps:

  1. Login to your Helpjuice account


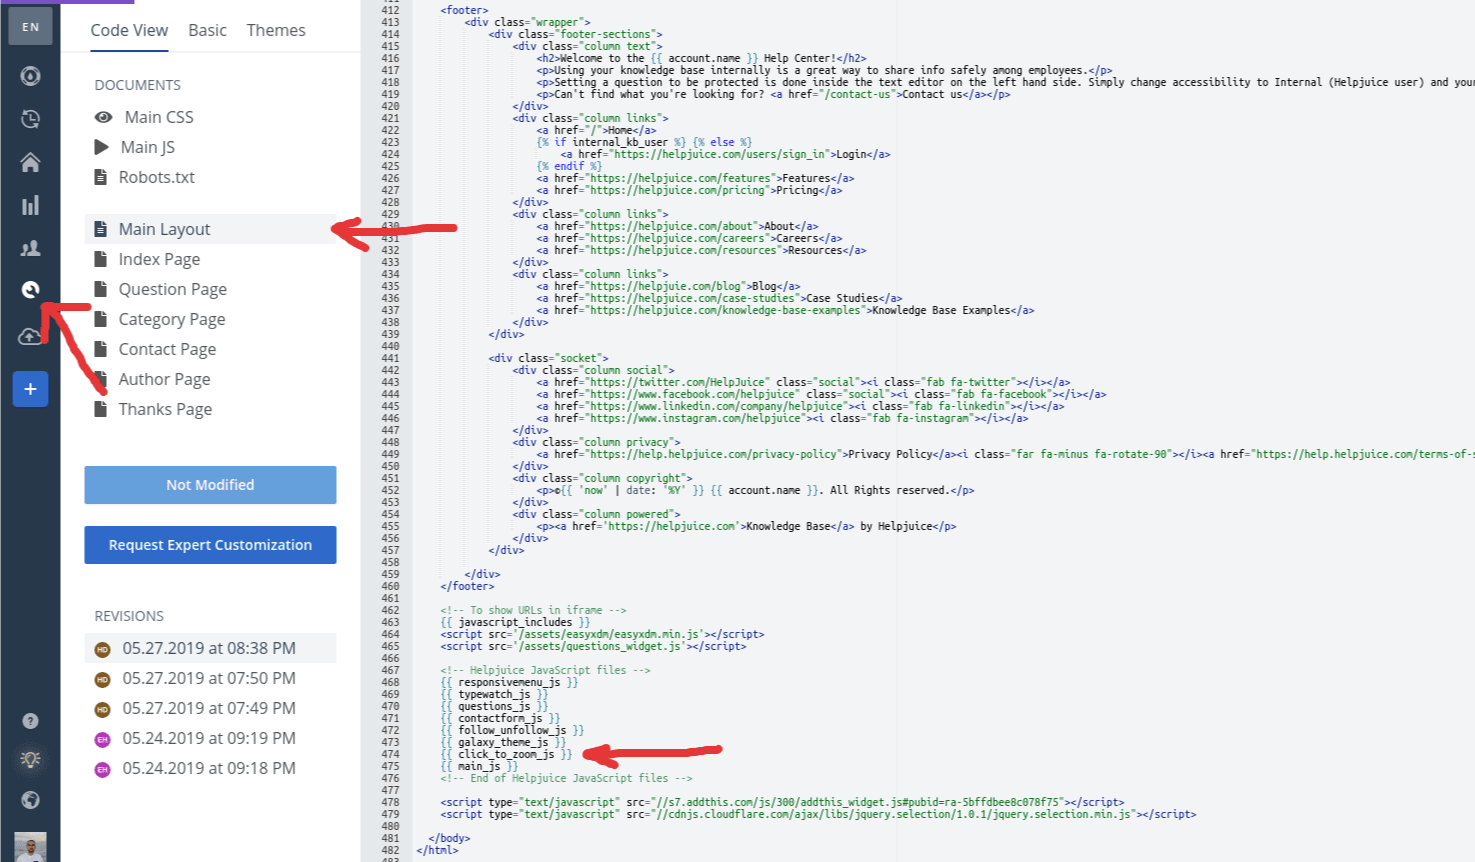
  2. Go to your customization tool -> main layout and at the end of the file just right before {{ main_js }} paste this code {{ click_to_zoom_js }} and save the file.


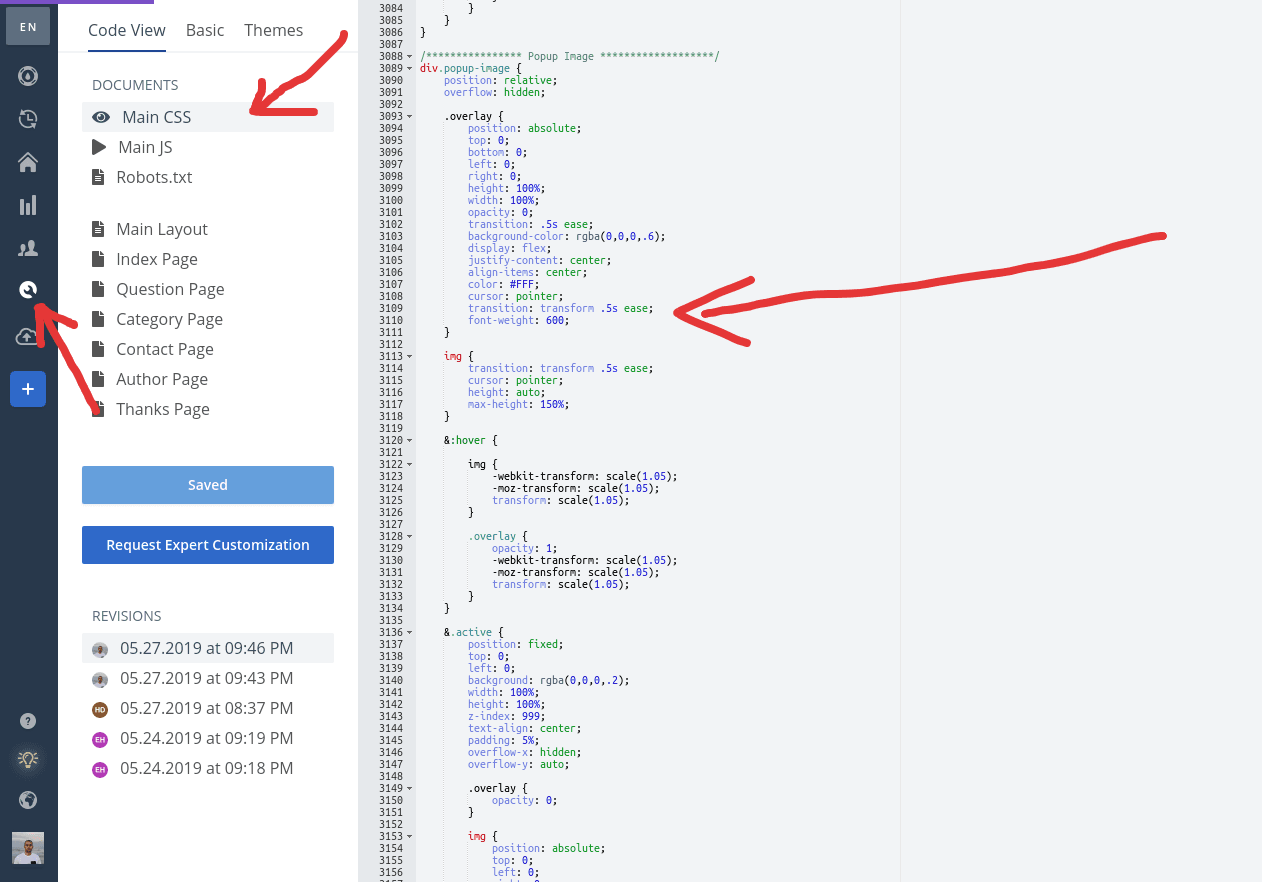
  3. After that go to your Main CSS file and at the end of that file paste the code below
/**************** Popup Image *******************/
div.popup-image {
    position: relative;
    overflow: hidden;
    .overlay {
        position: absolute;
        top: 0;
        bottom: 0;
        left: 0;
        right: 0;
        height: 100%;
        width: 100%;
        opacity: 0;
        transition: .5s ease;
        background-color: rgba(0,0,0,.6);
        display: flex;
        justify-content: center;
        align-items: center;
        color: #FFF;
        cursor: pointer;
        transition: transform .5s ease;
        font-weight: 600;
    }
    img {
        transition: transform .5s ease;
        cursor: pointer;
        height: auto;
        max-height: 150%;
    }
    &:hover {
        img {
            -webkit-transform: scale(1.05);
            -moz-transform: scale(1.05);
            transform: scale(1.05);
        }
        .overlay {
            opacity: 1;
            -webkit-transform: scale(1.05);
            -moz-transform: scale(1.05);
            transform: scale(1.05);
        }
    }
    &.active {
        position: fixed;
        top: 0;
        left: 0;
        background: rgba(0,0,0,.2);
        width: 100%;
        height: 100%;
        z-index: 999;
        text-align: center;
        padding: 5%;
        overflow-x: hidden;
        overflow-y: auto;
        .overlay {
            opacity: 0;
        }
        img {
            position: absolute;
            top: 0;
            left: 0;
            right: 0;
            bottom: 0;
            max-width: 90%;
            width: auto;
            margin: auto!important;
            animation: scaleImage .5s ease-in-out;
            @media (min-width: 1200px) {
                max-width: 80%;
                max-height: 80vh;
            }
            @media (min-width: 1440px) {
                max-width: 1400px;
            }
        }
        &:hover {
            img {
                -webkit-transform: scale(1);
                -moz-transform: scale(1);
                transform: scale(1);
            }
        }
    }
    @keyframes scaleImage {
        0% {
            -webkit-transform: scale(0.0);
            -moz-transform: scale(0.0);
            transform: scale(0.0);
        }
        100% {
            -webkit-transform: scale(1.0);
            -moz-transform: scale(1.0);
            transform: scale(1.0);
        }
    }
    
}


Hit Save and now you should be able to see click to zoom option.

Note:

If your account supports multiple languages, then you will need to repeat Step 2 for each language, CSS file is automatically updated for each language.


Was this article helpful?

Yes
No
Give feedback about this article

Related Articles

  • I’m Not Receiving Invoices
  • Installing Google Analytics on Helpjuice
  • Standard Sections

Copyright © 2023 - Helpjuice

Helpjuice, Inc. is a registered US Corporation, EIN # 45-2275731

Download W9
  • Help
  • Features
  • Pricing
  • About
  • Careers
  • Customers
  • Blog
  • Case Studies
  • Resources
  • Knowledge Base Examples
  • Privacy Policy
  • Terms of Service

Why is the knowledge base important?

With a knowledge base, you can allow your customers to self-help themselves, thus reducing your customer support by up to 60%. Furthermore, you can also have your team get instant answers to the questions they need without having to email themselves all using knowledge base software.

What is the purpose of a knowledge base?

The purpose of knowledge base software is to allow you to host your knowledge base/corporate wiki in one centralized 'hub'. Both your customers, and employees can now access information within seconds!

Made with from Miami, Bosnia, Morocco & Brasil

+1 (833) 387 3877 success@helpjuice.com
Expand