Overview: Add Category Filter to Search a Form
Allow your users to search by category.
Why allow your user to search by category?
Searching through a knowledge base is probably one of the most important sections/functionality in a knowledge base. By default every theme you install on your knowledge base will have the basic search form(without category selection).
While this is powerful enough to help your users find relevant answers, enriching your form functionality by giving the user the option to search only in a specific category will give him more precise and less messy results.
Steps to add category filter:
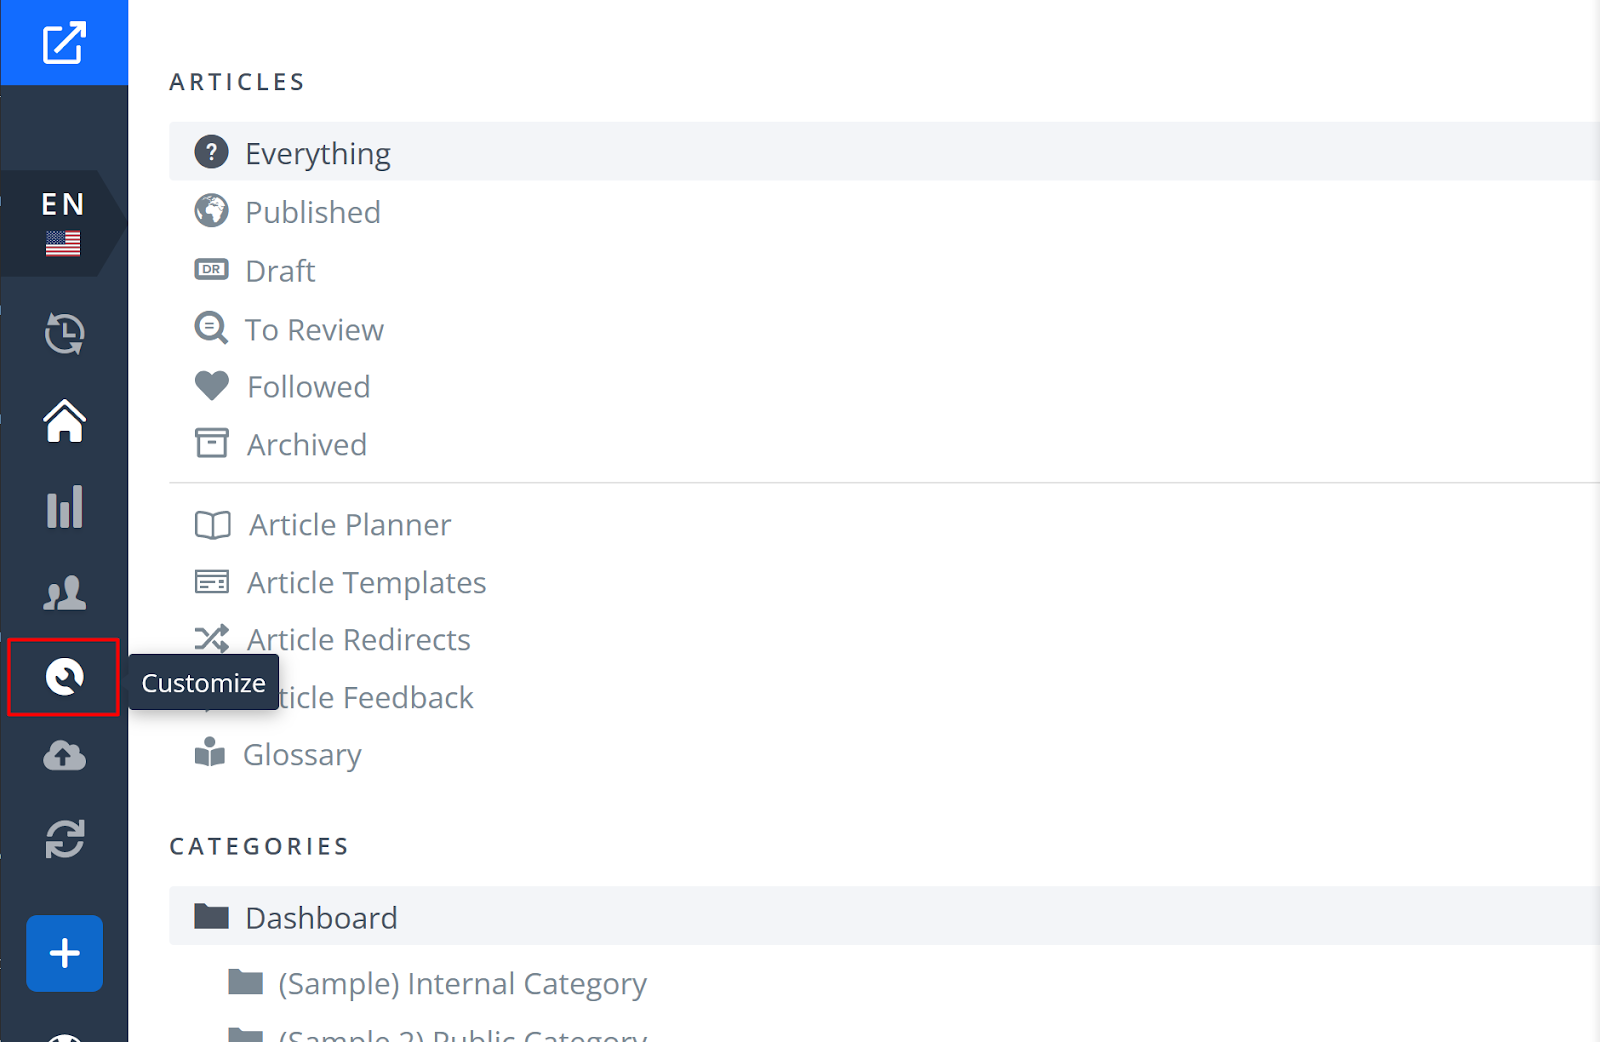
Step 1: Login to your knowledge as admin user and click on the customize button.

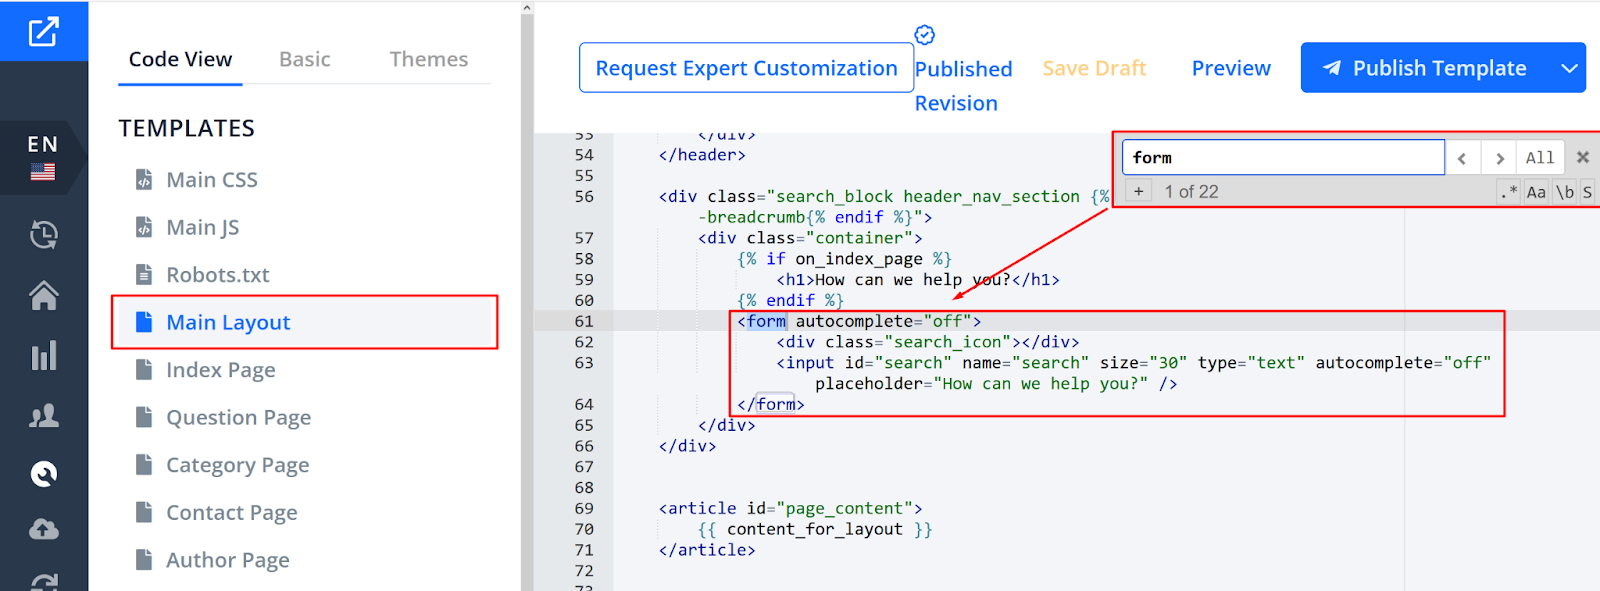
Step 2: Find the code of your current form.
( Search the main layout page as this is where the header elements of your theme are )
Use Control F or Command F(Mac) to search your Main layout page for the term “form”. Make sure that you have found the search form and follow step 3.

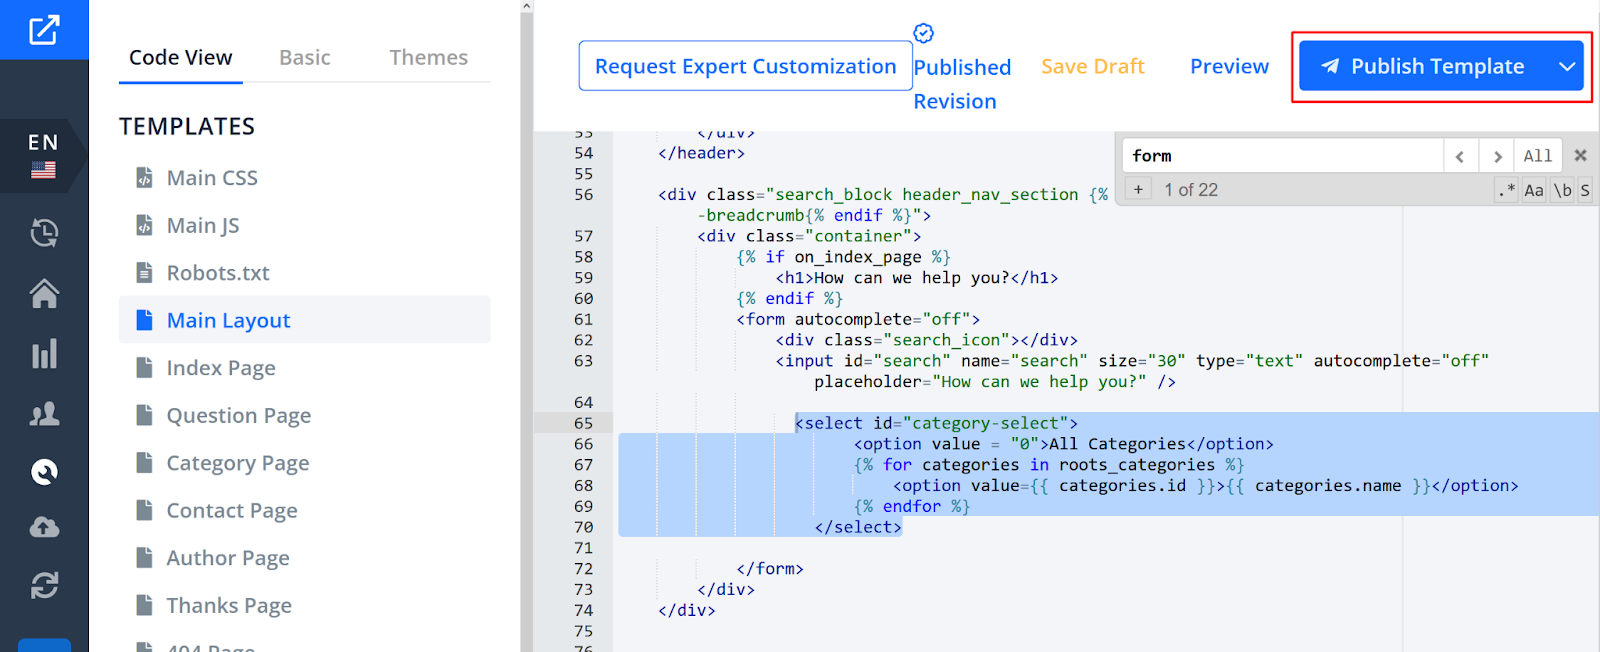
Step 3: Add the category dropdown.
 <select id="category-select">
    <option value="0">All Categories</option>
    {% for categories in roots_categories %}
        <option value="{{ categories.id }}">{{ categories.name }}</option>
    {% endfor %}
</select>
Step 4: Publish your changes
Click the Publish Template button to save your changes.

Step 5: Visit your knowledge base to view your changes.

As you can see the category dropdown has been added. However you would need to style the new element using CSS. You can do that in the Main CSS template file.
If you would like to know more about adding custom CSS you can read our Adding Custom CSS guide.
If you still feel like you need help adding the category dropdown and styling it properly, we always encourage our customers to have us do the customization for free.
You can do that by requesting an expert customization through our Request Expert Customization found under Dashboard > Customize > Request Expert Customization.
Video Overview:
Good to know about the implementation in this guide:
Now that we went through the steps adding the search by category functionality to your knowledge base it is a good idea to get a basic understanding on how and why it works.
Every Helpjuice knowledge base has all the necessary JavaScript files that work behind the scenes in order to add certain functionalities to your knowledge base.
For example in the theme documentation for the main layout page you can see some of the necessary links and scripts for your head section as shown below:
<head>
    <meta charset="utf-8">
	<!--[if IE]>-->
	<link href="/assets/main.css" rel="stylesheet">
	<link href="https://static.helpjuice.com/helpjuice_production/uploads/upload/image/1856/34388/flexboxgrid.min.css" rel="stylesheet">
	<ink href="https://maxcdn.bootstrapcdn.com/font-awesome/4.4.0/css/font-awesome.min.css" rel="stylesheet">
	<link href='https://fonts.googleapis.com/css?family=Lato:400,300,700,900,100' rel='stylesheet' type='text/css'>
	<script src="https://ajax.googleapis.com/ajax/libs/jquery/2.1.4/jquery.min.js"></script>
	<script src="https://cdnjs.cloudflare.com/ajax/libs/modernizr/2.8.3/modernizr.min.js"></script>
</head>
Why does the code work?
As mentioned above, in the head of your theme you have links to the necessary JavaScript files created by our team.
The JavaScript code will look for the select element with the id “category-select”.
 <select id="category-select">
    <option value="0">All Categories</option>
    {% for categories in roots_categories %}
        <option value="{{ categories.id }}">{{ categories.name }}</option>
    {% endfor %}
</select>
If the select element is present with the id category-select, then the script will fire an event on your form. So when the event is fired the script will check if the select element has an option with a specific category id selected and it will perform the search of your query for the selected category.
<option value="{{ categories.id }}">{{ categories.name }}</option>

